For the past eight months, I have been editing the second season of my audio drama, The Gray Area. It’s quite a daunting endeavor: a slate of episodes that will encapsulate the length of two average seasons of audio drama. Alas, there was no other way to tell the story. I anticipate a release date of the spring of this year, although there is still much work I need to do.
During this latest postproduction round, I have learned a great deal about sound, rhythm, mixing, leveling, inventiveness, plugins, and some basic pragmatic moves that have allowed me to improve as an editor. However, like everyone, I am still learning. Since there isn’t a lot of online material out there on how to edit audio drama, I have been gradually assembling a series of quick Instagram videos to help out producers who may be new to making audio drama. I’m sure that, had such a resource existed before I figured much of this out on my own, it would have saved me an incredible amount of time. It seems only right to pay it forward. So without further ado, here are some tips and tricks that may help you out as you tell your sonic stories! Unless otherwise noted, the software I am using for these videos is Reaper, an inexpensive DAW that never crashes and contains incredible power and that I swear undying allegiance to, and iZotope RX, a costly but essential tool I use for cleaning up dialogue and removing unanticipated noise. (This article serves as a production-centered companion piece to my essay “How to Write Audio Drama.”)
1. How to Make a Homegrown Sound Effect:
For those who cannot afford expensive sound effects libraries or who cannot find the right sound within the vast depository of Free Sound, consider the enormous sonic riches you may find in the world around you. A sound in a high frequency might produce something new and unanticipated in a lower register, and vice versa. Some of the most original sounds that I have discovered and used in The Gray Area are surprisingly commonplace. Much of my homegrown sound design comes from being inspired by wildly creative people who have approached the process of searching for the new in a similar manner. My feeling is that, if something very weird sounds vaguely familiar, an exotic sound will likely land better with an audience. It’s worth remembering that the TARDIS dematerialization effect in Doctor Who, still used after more than fifty years, is essentially a slowed down version of scraping the insides of a piano and that the Smoke Monster in Lost is, in part, composed of the credit card machines that were ubiquitous in Manhattan taxis around 2010 (and that, on a separate note, proved very tricky to track down for an upcoming story set in 2011; alas, we do what we can for historical authenticity!). The above video shows how I used a percussive instrument given to me on my birthday for an ethereal effect that I layered in a scene set inside a cosmic realm. (I also recommend Jonathan Mitchell’s excellent article on sound design, in which he breaks down how he put together sounds for a particular scene. Mitchell’s audio drama, The Truth, continues to remain a great inspiration point for me. He’s really one of the best sound design practitioners out there.)
For my audio drama adaptation of The Yellow Wallpaper, I took a commonplace sound of a tray being dropped in front of a Shure KSM32 — a large diaphragm mic used by Ira Glass that offers a warm and bright sound similar to a Neumann U87, but that is not $3,000 — and double tracked it. For the second track, I adjusted the speed. And the result was an ethereal clang that represented The Woman’s psychological schism. Don’t be afraid to mess around with different microphones and double tracking. Some audio drama producers swear by flat sounds that they can manipulate through postproduction tools. But I’m more fond of using the best microphone I have in my arsenal to get a particular tone (cold, warm, high, low) that I can accentuate in postproduction.
2. You Can Deviate from Your Script a Bit
If you want to get an audience to buy into your stories, it’s essential that you have your characters speaking in the most natural rhythm possible — even when you have stylized characters. Some of the time — even when you record the stories — the rhythm won’t always announce itself. But you will find it in the editing. In the above video, I demonstrate how lightly rearranging a line in the middle of a big dialogue chunk not only improved the flow of the scene, but allowed the reactions of the characters to be more natural.
3. Take Advantage of Free Plugins
One thing that people may not realize about iZotope, the remarkable company that puts out RX, is that the company also offers two free VST plugins that you can use for your DAW. (A VST plugin, if you don’t know what this is, is an add-on that Reaper can use for an effect. Here is a simple guide on how to add them in Reaper.) The two plugins in question — both of which I have experimented with — are Vinyl, which allows you to add a scratchy effect so that you can create the sonic aesthetic of an old recording, and Vocal Doubler, which allows a very subtle double tracking effect that proved useful for a scene in which I needed to have a character calling from an ethereal space.
Another free VST plugin that I discovered was Proximity by Tokyo Dawn Labs. There were some instances during editing in which simply leveling down and EQing a character so that the voice came across as quite distant did not sound right to my ears. In some cases, Proximity did a better and quicker job to shift a sound so that it matched what I wanted to hear inside my head.
You can also use Reaper’s built-in plugin ReaEQ to add distance, as demonstrated in the above video.
4. Using EQ to Match Dialogue
Even in the early stages of assembly, you do need to be mindful about matching tracks that were recorded in different sessions so that it sounds as if the characters are in the same room. Getting the dialogue rhythm right is one method of doing this. But to fully sell the illusion, mastering is key. It is one part of postproduction that is often not discussed, if it is even practiced at all, among audio drama producers. In the above video, I had an actor who sounded a little too trebly. So I adjusted the EQ settings by bumping down the high frequencies, stepping up the lows, and raising the mids. I still have more fine tuning to do for this scene as of this writing, but at least I have a solid baseline to build from when I return to the story on the next pass. One resource that proved incredibly useful in learning how to master was Ian Shepherd’s excellent podcast The Mastering Show. Shepherd has spent many years fighting against the Loudness Wars, a regrettable trend in music whereby producers in the early 21st century attempted to mix the loudest possible tracks. The result was muddled compression. Because all sound contains a maximum threshold. Audio drama is a uniquely intimate form. EQ and proper mastering will help you tremendously so that you don’t make the same mistake as these music producers.
5. How to Use RX to Repair Clipping
Clipping often happens when an actor delivers a fantastic performance, but is slightly blown out in the final recording. Sometimes, you have a situation in which the actor’s best performance is the one that is slightly clipped. Enter RX 7, which comes with a De-Clip module that will automatically adjust a slightly hot take. The above video shows RX’s power. With more audio drama being produced now than ever before, you want to make sure that your final product sounds as professional as possible. There is also a method of repairing clipping in Audacity, which I have also used. But while somewhat effective, I find that Audacity doesn’t hold a candle to RX. Even so, your job is to use the tools that you can find or that are within your budget. And there are many tools out there! For audio drama producers who are just starting out, Audacity — which still comes in very handy for me in certain editing situations — remains a solid place to start from.
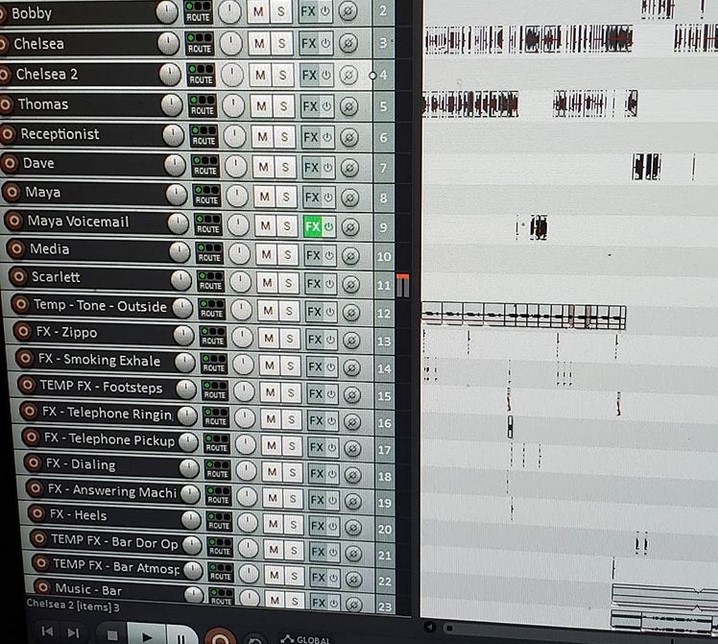
6. Splitting Dialogue in Reaper
I recorded more than 300 hours of audio over a period of eighteen months for the second season. Before I could even begin to put together my rough cuts, I needed to split and organize all this dialogue so that I could manage these complicated logistics. It took four months of seven day workweeks for me to get to this place. But it would have taken me much longer if I didn’t have Reaper.
Now there is a way to split audio in Adobe Audition — one that I have documented here — by adding markers to long files, merging the two points, and then exporting these files into a directory. However, I found that Reaper was a lot faster in splitting files, as I show in the above video. By splitting your long files into smaller items and then selecting them, you can use Reaper’s “Batch/File Item Converter” (found in the File dropdown menu) to add your selected files and then export them to the directory you want. Reaper allows numerous wildcards that allow you to title these newly split files in whatever manner is best for you.
I wish I would have known about this Reaper feature when I put together the first season. Because postproduction would have shuttled along much faster. But at least I discovered this hack in the second season. This has greatly sped up my workflow.
7. How to Remove Light Reverb with RX
Reverb is one of the most difficult qualities to remove from audio. Even if you aggressively filter it, you’re still going to be left with a flat, artifact-laden sound. I record with my actors in a large room in my apartment. I do this because I want to give my actors the freedom to move and gesticulate. Because this, to my mind, is essential to performance. Recording in a closet or a sound booth often hinders their ability to make interesting choices. And I am also performing with my actors when I direct them so that they have something real to react to. My own personal preference is to prioritize performance over technical restrition. However, the tradeoff of my production decision means that I sometimes have a few takes where there is light reverb. The extra space results in bouncing sound waves. And this, of course, is something that may not match across tracks.
Enter RX’s very useful Dialogue De-Reverb module, which has saved my bacon on more than one occasion. RX also comes with a very useful Dialogue Isolate feature, which is incredibly helpful in removing modest background noise. (Your goal in postproduction is to “rebuild” an audio environment. I do this by cleaning the sounds and then recording various location tones throughout New York City for a sound bed. And then I act out the characters’ physical actions as I listen to the actors perform through my headphones and use this as the starting point for my sound design.) But Dialogue Isolate doesn’t always cut it for light reverb situations. Dialogue De-Reverb does, however, and the above video demonstrates how you can do it.